Author Archives: admin

cake to celebrate

Last night, I was invited to eat with some lovely friends and so offered to bring sweets. The brief was simple; chocolate (that is, kid friendly) and gluten-free. I contemplated my Pinterest food board for a while but nothing seemed right (which made me wonder, does anyone use the recipes/ patterns/ other that they pin or is Pinterest just a place to daydream?!) and so I went back to a very favourite recipe.

DSC_1474

Wedding cake

This is the cake Scotto and I made for our wedding. And yesterday, it was twelve years since we started going out! So it was a lovely way to celebrate that and seeing good friends.

Wedding cake

Wedding cake

The original recipe was the Date-Nut Torte from the Moosewood Cookbook, a low, dense, chewy cake that relies on whipped egg whites and just a bit of flour for texture. After various modifications and lots of tasting, we added in bitter chocolate, dried figs and some really good quality crystallized ginger- and it was a hit at the wedding! I’ve made it quite a few times since, using what I had in the cupboard- as long as you get the batter right, the rest always seems to work. This time, I used dates, chocolate and walnuts and replaced the 1/3 cup flour with a combination of cocoa and almond meal to make it gluten-free- which definitely made it quite fudgy.

Fudgy

Fudgy

In case you’d like to try it, here is my modified recipe…

Gluten-free Date-Nut Torte

4 eggs, separated

1/4 tsp salt

1/2 cup sugar

1 tsp vanilla essence

1/2 tsp baking powder

1 tsp ground cinnamon

1/4 cup good quality cocoa powder

1/4 cup ground nuts- almonds, hazelnuts, walnuts…

1/2 cup walnuts, roughly chopped

2/3 cup dates, roughly chopped

2/3 cup chocolate (minimum 70% cocoa), roughly chopped

Preheat oven to 170C and grease a 20cm round springform cake tin. Beat egg whites and salt to stiff peaks and set aside. Beat egg yolks with sugar and vanilla until thick and creamy. Stir dry ingredients into egg yolk mix, and then mix in dates. Add 1/4 of egg whites into batter and fold in gently, then fold in remaining whites, just enough to combine.

Pour into pan and cook for 40-50 minutes until the top is springy. This cake will always have a moist centre; avoid drying out the outside by leaving it too long in the oven waiting for the skewer to come out clean!

Serve with cream or ice-cream, ideally something with some bitterness or spice to temper the sweetness of the cake; I’d like to try it with one of these next time!

Enjoy! And happy 12 years, Scotto xx

new beginnings in work

As many of you know, for a bunch of reasons, I’ve needed to focus a lot of energy on things happening around me and to people close to me for a good year or more. It’s left me deeply exhausted with no energy to undertake anything really new or challenging, especially anything that relies on my own impetus and momentum… I just haven’t had any! I’ve struggled with that and found it really hard to find the balance between surrendering to the process (which is essential and absolutely what I have wanted and needed to do) and maintaining a sense of myself and my own purpose. I’ve also found that, when something terrible happens to someone you love, it can be hard to feel ok about putting energy into good things, about making new beginnings when they may have only endings. This is only my experience up to this point… I hope that others experience and see it differently and I am sure many of those terminally ill would tell me I am wrong in feeling the way I have. When Michelle wrote beautifully about this recently, she reminded me of the need for hope and beauty in the face of darkness. I think I still have a lot to learn about life.

And so I am making some new beginnings. Today I start at Sunspun, the best little yarn shop in town! My friend Amy recently took over this lovely old girl and, while the the best and most beautiful aspects of the shop will endure, she’s gradually making some great changes. I get to work with very beautiful yarn and great friends and to meet a whole new group of knitters- I couldn’t be more thrilled… Come and say hello to us sometime soon! This new position means that I’ll no longer be on the floor at Morris and Sons (though I’ll still be teaching there most Saturday afternoons) and I’m really quite sad to say goodbye to my community there- it’s been 4 1/2 years and everyone is like family!! However, this knit community of ours is a small one and I think we’ll be seeing each other for sure… and the change will ultimately be a good thing for me.

I’m also working towards putting out there the colourwork cowls (non-knitters: read neckwarmers!) that I’ve been making recently. I’ve been wanting to do this for a while and I finally have the space and energy to set up and run a little online shop. See the shop tab on my header?! It isn’t connected to my bigcartel shop yet, but it will be very soon!

This cowl design is a simple, double-layer tube made on my hand-operated vintage knitting machine. The rectangle works really well as a canvas for colourwork patterns,  all inspired by botanical shapes, naturally! The shape and size mean that it sits comfortably around the neck and the double layer keeps the warmth in and the wind out.

Red on blue

Deco Fern in jasper: marlin colourway

Jasper on Marlin

Deco Fern in jasper: marlin colourway

Several commissions for a good friend Amanda has given me the kickstart I needed to get moving on these. Anyone who knows Amanda will immediately recognize her colour palette- grey on grey on grey! I’ll be working with a much wider range of colours in lambswool for mine but I really loved working with Amanda’s colours and luxury fibres- cashmere and mink!

Snow cowl

Snow cowl

Snow cowl: detail

Snow cowl: detail

Honeycomb cowl

Deco Fern cowl

Honeycomb cowl

Banksia cowl

Honeycomb cowl: detail

Banksia cowl: detail

So, as well as working on some new classes for the Craft Sessions, that’s a fair bit of new! Wish me luck with it all… I’m feeling super excited but a bit overwhelmed too.

finished ursula, willamette and celes

You’d be forgiven for thinking that this little place has swapped from knitting blog to dye blog… not that I mean to limit it to just one topic, but it has been pretty dye-heavy recently. That’s mostly because, along with my dye sample book, it works well as a log for dyeing experiments, rather than because of a lack of knitting.

This is my version of the Ursula Cardigan from Kate Davies’ Colours of Shetland

Ursula

Ursula

Ursula

Ursula

Ursula

Ursula

I chose muted colours very different to Kate’s fresh, clear palette; it makes sense for hers to be worked in spring colours because it would be a spring cardigan in Scotland, whereas it’s definitely more suited to winter for me here in Melbourne. The colours make it something I can wear every day with dark jeans… but also make me want to break out of my regular uniform and make myself a grey tweed skirt to wear with it!

I can’t say enough good things about this pattern! Kate has combined traditional knitting techniques with beautiful and thoughtful details and great pattern-writing to create a beautiful and well-fitting garment. I changed mine to a v-neck and I’m really happy with the outcome- it looks nice done up and open on me. The only thing I’d  do differently next time would be to go down a needle size or two, just for the mid-torso, to add a bit of waist definition. It’s a bit blocky as is and I need all the definition I can get as any extra weight goes straight to my belly ; )

Ravelled here.

Next up is Willamette from Amy Christoffers

Willamette

Willamette

Willamette

Willamette

Amy is super cool and has a background in fine art; I think you can really see that in her designs, which merge super-wearable shapes with beautiful details and textures. This jacket is so snug and warm but also feels kinda smart in a very organic, “Japanese” way ; )  It’s getting quite a bit of wear and will definitely be keeping me warm at Bendigo this Sunday. I love that tweed stitch pattern…

Ravelled here.

And lastly, Celes from Jared Flood

Celes

Celes

Celes

Celes

Amy and I started knitting this scarf/ shawl together this time last year, just after she had her little boy Finn… needless to say, she had more important things to do and never got around to finishing it! I got all the way through the body and 3/4 of the way around the knitted-on edging and then ran out of yarn… yes, like many others commented on ravelry, the metrage listed for this pattern is short. It was the first time I’ve run out of a discontinued colourway and really not known how to proceed- distressing ; ) And so it sat unfinished until recently, when I decided to just go ahead with the closest colour I could find to this unusual, yellow-based grey. I’d much rather embrace imperfection than never finish it. You can see the different colour on the edging in the first photo… I can live with that. The pattern is inspired by traditional Shetland lace patterns and definitely lacier than what I’d normally wear but I think the grey tones that down and makes it wearable for me…

Ravelled here.

So that’s my knitting of late. Soon to come off the needles will be Scatness Tunic, another colourwork pattern from Colours of Shetland and again in very different colours to the original.

What are you knitting at the moment?

madder, mordants and modifiers

I’ve been experimenting with plant dyes for a while but still feel a bit in the dark when it comes to the effects of pH on plant pigments… Lots of experts allude to the importance of pH in their books and blogs but it seems there is very little detail about it… so I decided to follow an experiment outlined by Jenny Dean in her wonderful dyers bible, Wild Colour (so worth getting your hands on if you’re at all tempted to try dyeing with plants!) which displays the effects of not only pH modifiers but also pre-and-postmordanting.

DSC_1177

Madder in post-treatment groups; none, acid, alkaline, copper, iron

Mordanting is also pretty new to me; I’ve been pre-mordanting yarn with alum and cream of tartar (that is, treating yarn before dyeing) with good results but I feel quite ambivalent about introducing salts and metals, such as copper and iron, and other substances like ammonia into my dyebaths or as post-treatments… I know I can learn more about the potential colours held by a plant if I use them but I’ve been asking myself to what length I’ll go for that knowledge… it is a really personal question and I’m still working out how I feel about the potential environmental cost of my experiments and so I generally avoid using anything other than alum… but I thought it was important to temporarily put aside my ethics for this comprehensive experiment, hoping it would prove enlightening!

To prepare the dyebath, I put 250gm dried madder root (1:1 ratio of madder to fibre) in a large jar, covered with boiling water and set the jar in the sun for 2 weeks to soften the woody roots. I then poured off the soaking water (as madder releases its yellow and orange pigments first and the more desirable red pigments only later) and repeated the process, soaking the roots for another week. I then chopped the madder as finely as possible to maximise surface area, placed it in my large, heavy-bottomed dye pot, covered with warm water and then slowly heated it to 65C for one hour. I left the pot to cool overnight and then heated and held it at 65C for another hour the next day. Phew, it was finally ready for the fibre!

In preparation for dyeing, I wound 25 10gm skeins of 5-ply Polwarth yarn from local producer Wendy Dennis (which I’m discovering takes dye really well, almost as well as superwash which soaks up everything but often has trouble holding colour because of the stripping involved in its production!) and set aside 5 skeins. The other 20 were treated as follows: 5 premordanted in 10% alum, 5 in 2% copper solution, 5 in 2% iron solution and 5 in rhubarb leaf decoction.

Premordanted yarn; rhubarb, copper, iron, alum

Premordanted yarn; rhubarb, copper, iron, alum

All skeins were labelled with a letter from A to Y which indicated their pre-treatment, written on a square of heat-proof plastic (like a milk container) with a permanent marker- this is essential as it becomes impossible to keep track of what is what later!

While still damp from their pre-treaments, I then added the 25 skeins to the dye bath and slowly brought the temperature to 65C for 2 hours and then left the bath to cool overnight. Actually, it was meant to be overnight… but life got busy and I didn’t get back to the pot until a week later! No problem though- wool fibres are designed to withstand permanently damp conditions over long winters!

I removed one skein from each premordant group and hung the 5 to dry with no further treatment.

* I’ve been trying to photograph these for days but the low levels of light combined with the reds make it super hard to capture the colours accurately! The samples are all less orange than they look and there is quite a lot more contrast between the different groups than appears in the group photos. See the top photo for a clearer picture of the contrasts!

DSC_1148

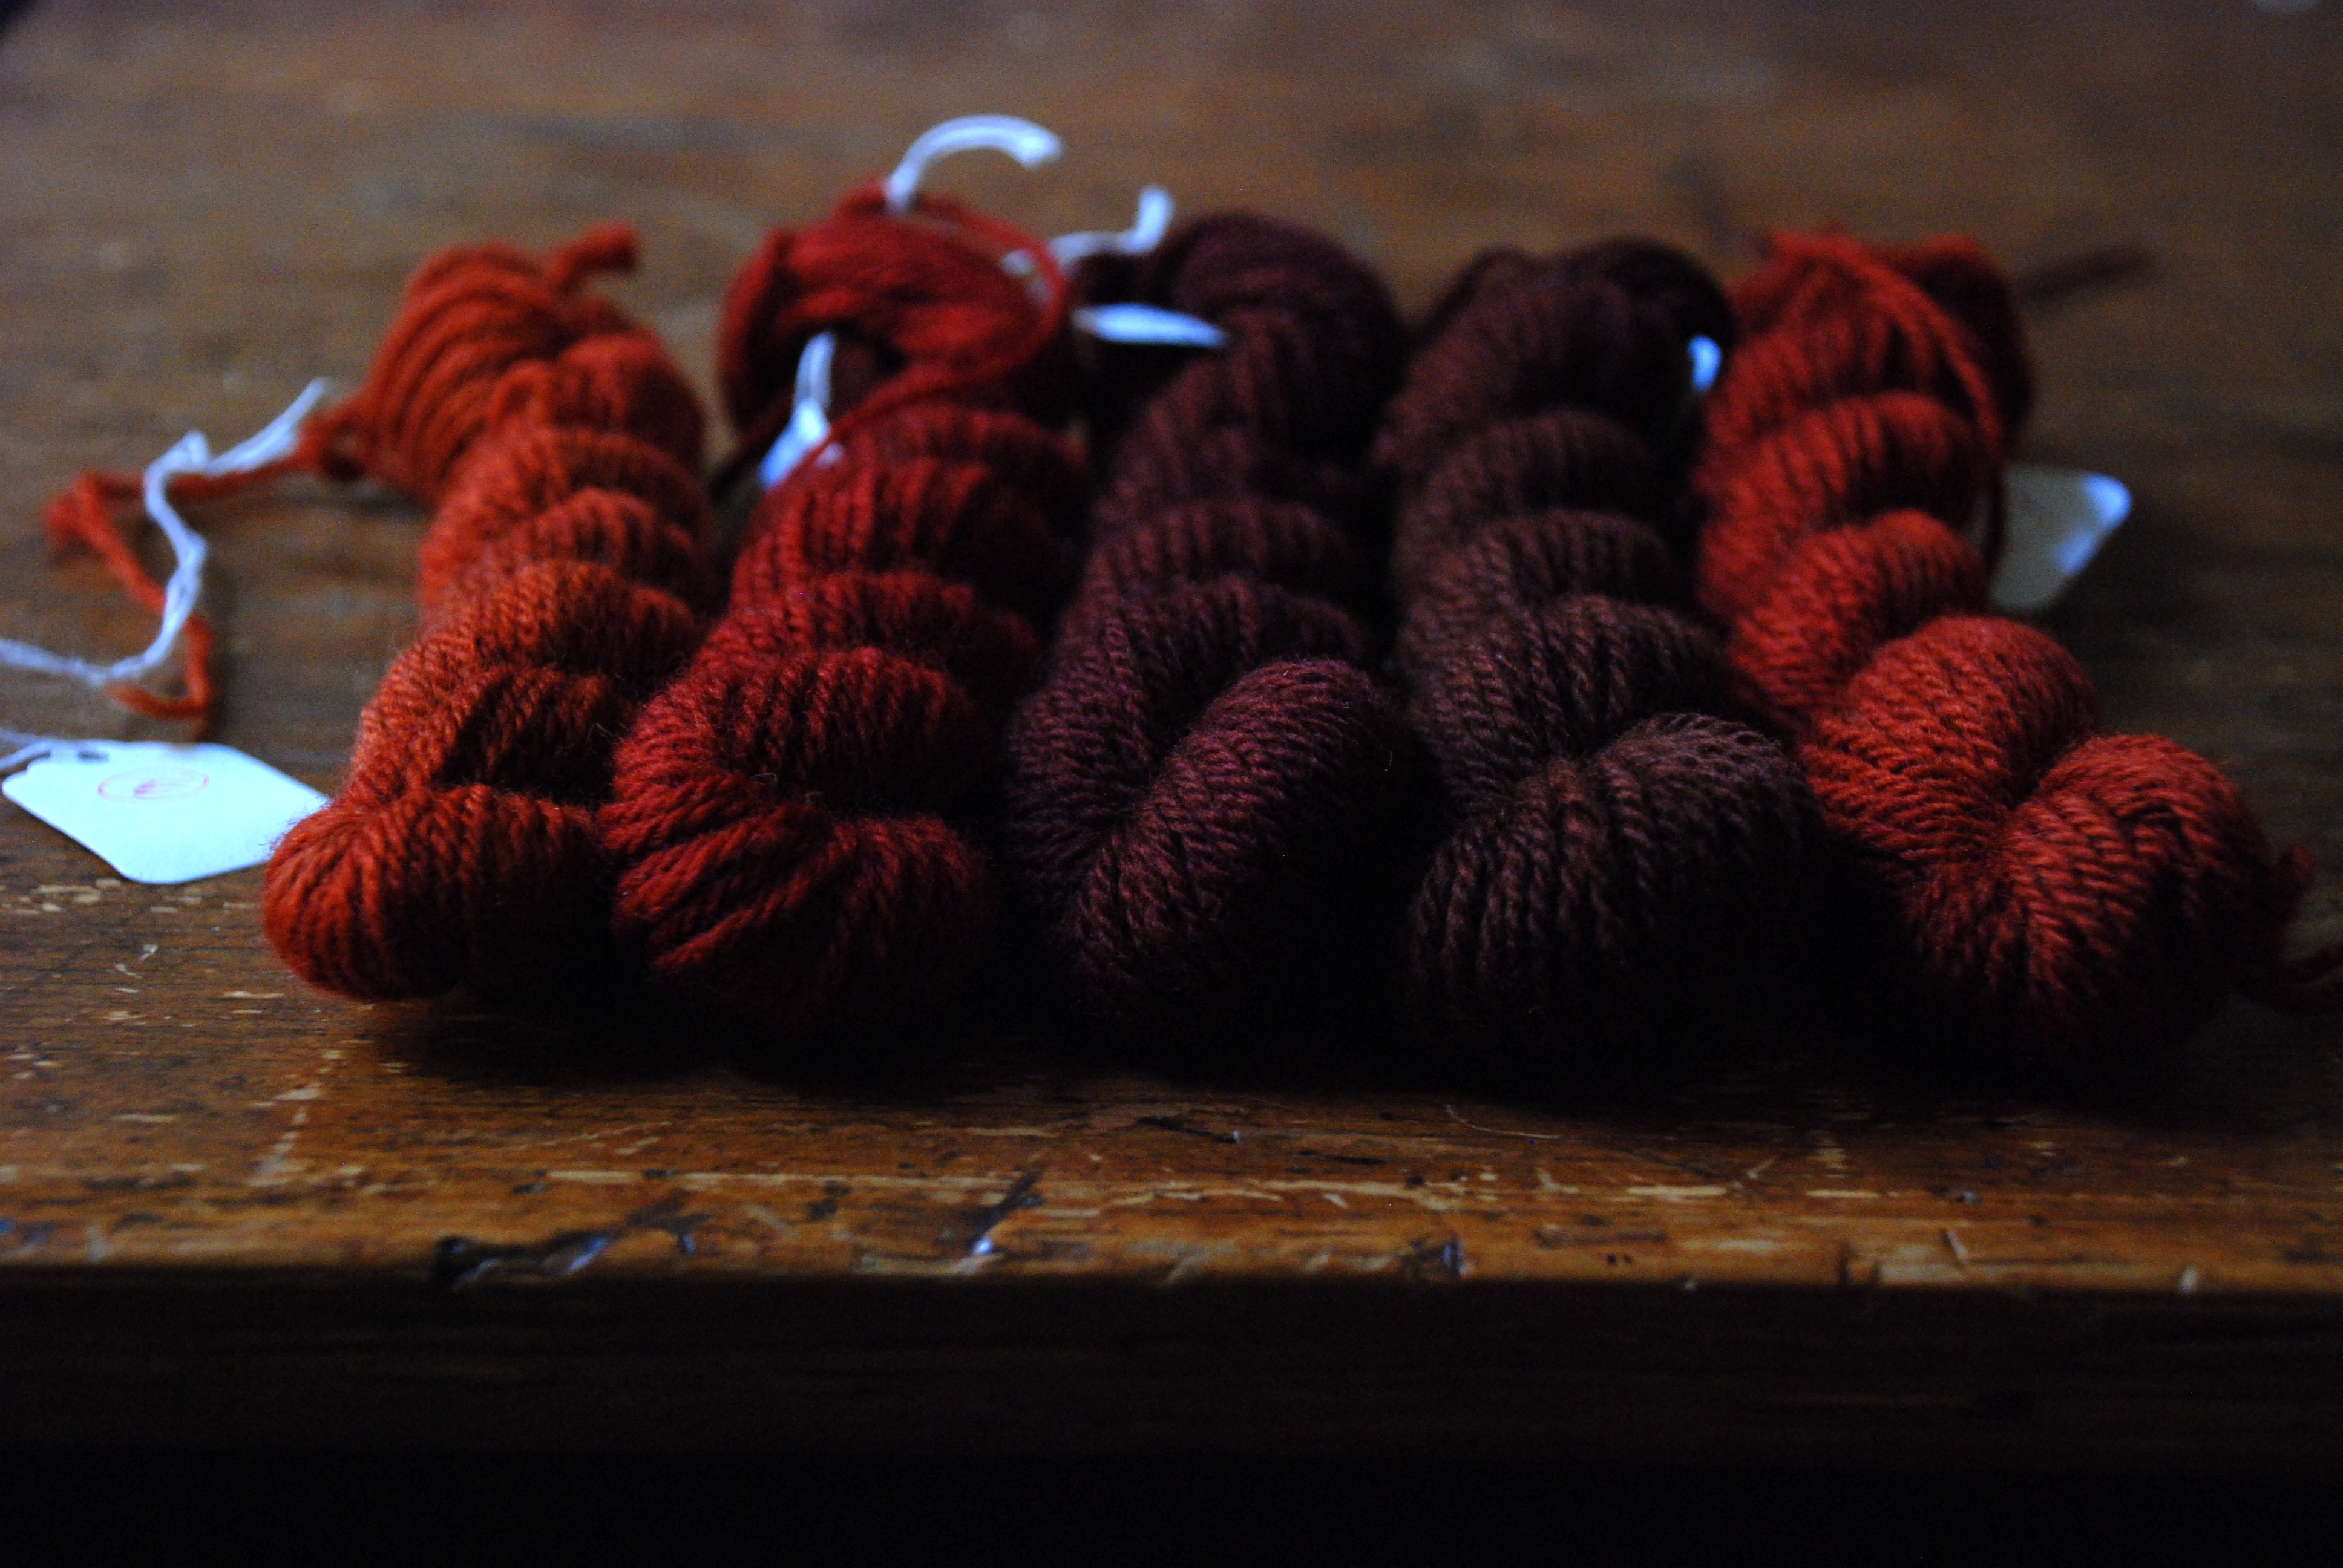
No post-treatment; premordanted with none, alum, copper, iron, rhubarb

One from each group was placed in a glass bowl with hot water and 100ml of vinegar and left to sit for 15 minutes- the vinegar brought the pH of the water down from 5 to 3, forming an acidic bath, which tends to bring out the orange tones in reds.

DSC_1150

Acid post-treatment; premordanted with none, alum, copper, iron, rhubarb

One from each group was placed in a glass bowl with warm water and 50gm of washing soda and then 50ml of ammonia and left to sit for 15 minutes- the washing soda took the pH to 7 (still in the neutral zone and wasn’t high enough to change the colours of the yarn) whereas the ammonia brought the pH of the water up from 5 to 9, forming an alkaline bath, which usually makes colours pinker in tones.

DSC_1153

Alkaline post-treatment; premordanted in none, alum, copper, iron, rhubarb

One from each group was placed in a pot with warm water and 1gm copper dissolved in water and then held below simmering for 15 minutes- copper makes colours greener or browner in tone and often helps to make colours more permanent.

DSC_1221

Copper post-treatment; premordanted in none, alum, copper, iron, rhubarb

One from each group was placed in a pot with warm water and 1gm iron dissolved in water and then held below simmering for 5 minutes- iron makes colours darker and more sombre in tone and often helps to make colours more permanent.

DSC_1223

Iron post-treatment; premordanted with none, alum, copper, iron, rhubarb

So… lots observed in this experiment:

– Pre-mordanting with copper and iron leads to much stronger colours than modifiying with them after the dye-bath.

– I was surprised that the alum-mordanted skeins turned out a darker, rusty orange than the non-mordanted skeins- Jenny Dean finds the opposite.

– The copper-mordanted and iron-mordanted skeins dyed about as dark as each other, the copper a dark aubergine and the iron a tobacco brown. In the photos outlining this experiment in Deans book, the copper looks much darker.

– The rhubarb-mordanted skeins dyed very similarly to the non-mordanted skeins- I used very fresh, new leaves so will try tougher, older leaves next time as they may hold more oxalic acid, the mordanting compound.

– The acid post-treatment skeins ended up only slightly more orange than those which had no post-treatment- I think this is because my water is naturally acidic.

– As stated by many dye experts, the alkaline post-treatment is the way to go for red tones!

– I expected all the skeins in the copper and iron post-treatment groups to end up much darker than they did… perhaps I didn’t use enough in the baths.

And my thoughts on modifiers and mordants after the experiment? Vinegar I’m fine with using but ammonia is pretty strong so I’m going to try to work out how much washing soda I need to add to take my water to alkaline, as well as capturing rainwater to see how that affects pH. I definitely saw first hand the increased range of colours attained with copper and iron so I’m going to try the methods outlined in Harvesting Colour for using scrap materials to make mordants. I didn’t use them here as I wanted to be exact with quantities but it feels like a much better option than buying powders!

It seems like I ended up with a very seventies palette! I feel like I should be weaving a shagpile wall hanging with them ; ) There are some beauties though…and it is wonderful to have more confidence in extracting the tones that appeal to me.

DSC_1229

Rhubarb/ none, alum/ none, alum/ alkaline, rhubarb/ alkaline/ copper/ alkaline, iron/ alkaline

As for all the little 10gm skeins, I’ll be using some of them for colourwork and passing the rest on. I thought I might hold my first giveaway on this little blog! So leave me a comment if you are interested and I’ll draw it next week- after I show my dye teacher the results!

PS These are silk/wool and angora yarns that I put in afterwards to exhaust the bath… I used an alkaline post-treatment for those pink-salmon tones and think I like it better than the others!

DSC_1160

Exhausting the bath; wool/ silk and wool/ angora with alkaline post-treatment

the craft sessions

tcs_logo_final

In planning for a matter of years, this beautiful weekend is all about bringing love and joy to folk who enjoy (or want to enjoy!) making things with their hands. It’s about expanding our approach to craft, learning new skills and even trying something completely new. It’s also about having time with others who love the stuff we love and having some quiet time as well. It should be wonderful.

I’m honored and so excited to be teaching at the Craft Sessions… I’ve been teaching knitting for a while now but it was attending a big overseas knit camp that helped me really see just how much is shared, learned and built at this kind of gathering. And now we have our own! I’m extra thrilled to be amongst such talented local teachers because homegrown is good.

The full class descriptions will be released early next week but there will be sewing, embroidery, printing, quilting, knitting, crochet and more- and, if you know me at all, you’ll have guessed that my classes will definitely have something to do with knitting and colour!

Colour knitting

You can keep up with the latest on Facebook or by joining the mailing list. You’re going to want to come along!